Saturday, September 21, 2013

Vita Yin Yang Cordyceps Capsules – Sponsored Post ❤

I was contacted by Ms Elfaine for The Sample Store to try out 1 month supply of Vita Yin Yang(Cordyceps capsules) by the company Vita Green. At 1st I was pretty sceptical to try such supplement as it is meant to be consumed in.

To be honest, I do not have much knowledge about Chinese herbal Medicines. Hence, I visited the VitaYin Yang link and researched on Cordyceps before taking up this sponsorship (I want to make sure that my readers get the best information out of this post.. haha… to those who are not familiar with Chinese herbal medicines).

According to the website, Vita Yin Yang is made from manufactured pure cultivated Cordyceps. Cordyceps has long been regarded as an elixir of life, which was consumed by the imperial and wealthy families as an exclusive nutritional supplement (expensive stuff!!) Cordyceps possesses both therapeutic and nutritional properties for overall health (have shown this to my mum and she said that is good for health and encourage me to take regularly).

Cordyceps are also known as Chinese Caterpillar Fungus ( it actually looks like worm to me but it’s not!!) Cordyceps is a composite herb of the stroma of the fungus and its host, the dead caterpillar (Fam. Hepialidae). Which is why Cordyceps are commonly called “winter worm. Summer Grass” (冬虫草).


Vita YinYang is an ultimate health enhancer for kidneys, lung and immune functions. It helps to tonify kidney and lung yin.  I have heard from my colleague that it regulates your body’s immune system ( good for me as I am always feeling tired and sick). 


Product Description

Pollution, stress, poor diet and lack of exercise can all take their toll on our lungs and kidneys, giving rise to illness and disorders. In Chinese medicine, kidney and lung function are related so that a weakness in either organ can create problems such as respiratory discomfort, coughing and general malaise. Made from premium Cordyceps, Vita Yin Yang can help the kidneys to retain useful nutrients; excrete harmful substances and alleviate excretory problems; relieve symptoms of weak kidneys such as tiredness; and delay the need for medical intervention such as kidney washouts. Improved lung functions include relief from coughing and breathing discomforts and improved inhalation and exhalation.

Ingredients

Cordyceps sinensis (Fermented)

Dosage

For health maintenance, 1 capsule daily, take orally.
For health improvement, 2 or 3 capsules daily, take orally.

 Win Win’s Tots 

I was impressed by the packaging. At 1st I thought it would be capsules in a bottle like normal supplements but when I opened up the box, the capsules were packed in individual of 10 capsules per pack. These also make it more travel friendly. 

The capsule has a very strong Chinese medicine smell however it’s tasteless when consumed. This is a plus as most of the Chinese medicines are bitter. 

I feel that this Cordyceps capsules had really improved my immune system. My body kinda felt “warmer”. Normally in air-conditional places, I tend to get cold very easily but after consuming VitaYin Yang Capsules I don’t feel as cold as what I used to be.

For other benefits, I have yet to feel it. Probably I have only started to take this for about 2 weeks. I will continue to consume and update you guys if more benefits are discovered.

Hope this post is beneficial to you J

Win Win

** Disclaimer: The items above are sent to me by PR and reviews are based on personal opinion. 

Friday, September 13, 2013

Soak – Off Gel Nails Removal at Home – 1st Attempt ❤

Hellooooo....

As promised (ahem.. I am late though), here is my 1st attempt on removal gelish nail polish at home. If you guys are interested in how to apply soak of gel nails, feel free to refer to my previous post or you can just CLICK HERE!

To remove gelish nails, you need to prepare the followings:

Nail Polish Remover
Nail file
Cotton balls / pads
Wooden cuticle stick
Aluminium Foils (cut into smaller pieces, make sure its big enough to wrap your fingers)
Nail Buffer & Polish (optional, use if you want to restore the healthy looks of your nails)


Win Win “step by step” DIY Gelish Manicure Removal


1.  File your nails to destroy the surface of the gel nails (don’t ask me why but my manicurist does that, I think it make it easier to remove in the later steps)


2. Soak your cotton balls with nail polish remover (Acetone) and place it on the nail.


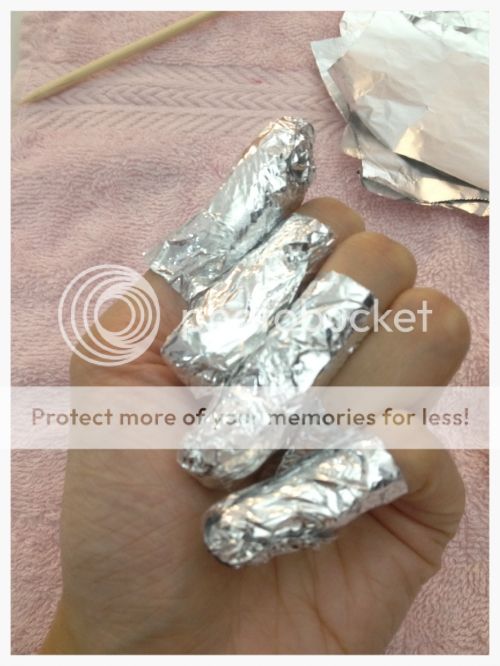
3. Wrap aluminium foil around finger.

 photo null_zpsb1079138.jpg


4. Complete step 1 to 3 for all 10 fingers.
5. Leave it on for 10-15 minutes.
6. Remove aluminium foils with cotton.
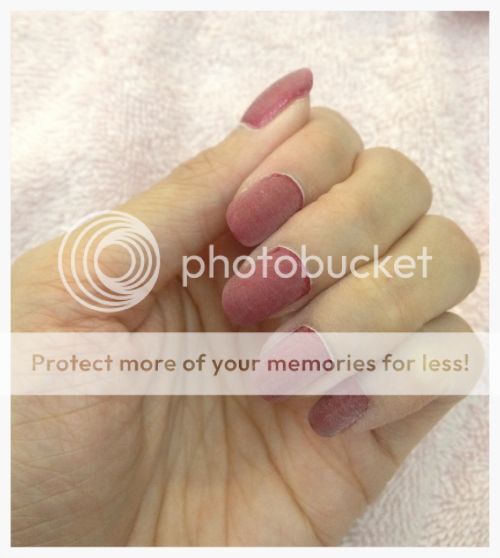
7. The gel nail polish should look like this and is slightly lifted up.


8. Scrap off the gel nail polish using wooden cuticle stick gently.


9. Remove excess gel polish with nail polish remover again if needed.
10. Buff and polish nails to restore healthy nails.
11. Apply cuticle oil / hand cream.


Simple as that… with these steps, you can apply and remove gelish nail polish yourself and save $$.
Hope you guys like it… enjoy beautifying your nails.

Lastly.... yoki baby says hellooooo~


Win Win

Friday, September 6, 2013

Soak – Off Gel Nails at Home – 1st Attempt ❤

Hey babes… today I want to talk about soak of Gel nails (Gelish Nails might be a more familiar term). I love the idea of Gelish manicure/ pedicure. Whoever invented this, I  L o V e  y O u ! ! 

I usually get my gelish pedicure done in Malaysia (my hubby’s home town in Kluang) as it is cheaper than in Singapore (well, I do not have a nail sponsor… Sad....) For gelish manicure, I can only do it during long holidays or really special occasions like my wedding day!!!

I am not able to put on nail polish during normal day due to my work constraints… sad.. I super envy those who can go to work with really pretty and fancy nails. My work life is sooooooo restricted. So I tot, since I cannot paint my nails!! I will paint my toes!! Hahaha (at least it made me feel a little prettier haha~)

Ok enough of my ranting, already complaint till out of topic…. I have just DIY-ed my own Gel nails at home!! Excited!!! I always wanted to try to do Gelish Manicure / Pedicure myself. I like to paint my nails/toes but I hate the loooong waiting time for normal nail polish and I often mess up my left hand (I am right handed).

I have got tonnes of nail polishes (normal nail polish), I kept buying but never really apply already because I have gelish pedicure constantly, changing colour almost every 1 to 1.5 months. Haha.

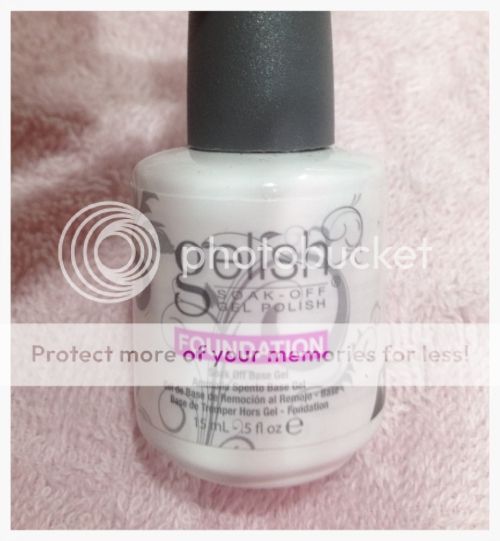
To start to DIY gel nails, of cos you need to have basic essential items like – UV Lamp, Gelish PH Bond, Gelish Foundation, Gelish Nail Colour, Gelish Top coat and nail surface cleanser. Here, I am talking about the really basic items you need, of cos you can buy more like the cuticle cutter, cuticle nourishing oil, bla bla bla…. Oh ya and you can buy the brand you prefer not necessary to be from Gelish. 

I got my UV LED Lamp off Q0010 for $59 Sgd (I prefer UV LED than UV lamp, I feel UV lamp is not good got skin in long term). Super cute and its pink in colour ( u guys know I am sucker for pink stuff)  If you are interested, you can go search for one from Qoo10, there are so many designs available and price ranging from $40 - $300+

Qoo10 Seller that I got from: Beauty Minimart (super nice seller, relatively fast shipping and reliable)

All my gelish products that I have mentioned above is from: D.Y.O.N InternationalSingapore (Located at Scape Underground) I think they have a huge range of variety there and prices are pretty reasonable. They do have UV Led Lamps there too. Check it out yourself!!

I personally think it will be more worth to get in set then buying individually, I am the stupid one who bot all individually and end up spending more~~~ 

Win Win “step by step” DIY Gelish Manicure


Step 1: Buff nails to remove shine from nails (gelish nail polish will not be long lasting on smooth nails)


Step 2: Clean your nails with Gelish nail surface cleanser using cotton pads (lint free ones are recommended, but I just used the normal one)


Step 3: Apply Gelish PH Bond to nails (this PH Bond is used on natural nails as a dehydrator prior to next step)

Step 4: Apply thin coat of Gelish Foundation and make sure you seal the edges (to ensure long lasting gelish nails)


Step 5: Place you hand under LED UV Lamp for 30Secs (I cured for 30Secs since my UV LED Lamp have self timer of 30Secs)


Step 6: Apply one thin coat Gelish nail polish and make sure the edges are sealed ( I am using Good Gossip)

Step 7: Cure your fingers under UV Led Lamp for another 30Secs.

Step 8: Apply another thin layer of Gelish Nail Polish and seal the edges (you can apply more layers as desired)

Step 9: Cure fingers under UV Led Lamp for another 30 Secs.

Step 10: Apply Gelish Top it Off and cure for another 30 Secs.


Step 11: Clear tacky surface with Gelish Surface Cleanser, it the polish are properly cured, it shouldn’t be removed by the Surface Cleanser.


Tah Dah… I have pretty gelish nails!! (my left hand is not as perfect as usual)

However, when we praise about how well and long lasting gelish nails can be, the gelish nail removing process is tedious and it normally takes longer time and effort to remove it. Will share with you guys the procedure of removing gel nails at home later (I need to remove it like 2 days later, so stay tune but if you can’t wait, you can always Google or youtube).

Hope you guys like my sharing and do comment below!! 


** Disclaimer: The items above are purchased by my own money and reviews are based on personal opinion. 

Win Win